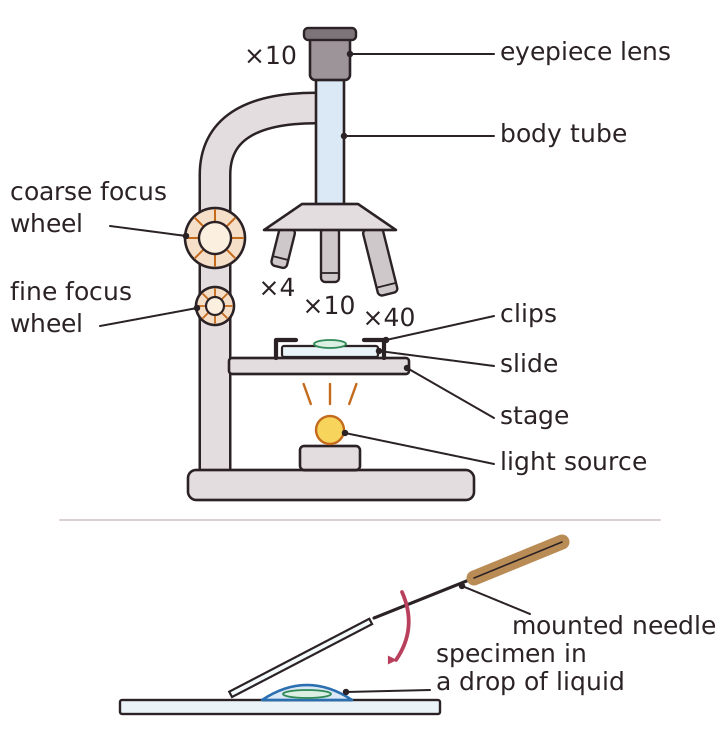
A light microscope is used to look at thin specimens such as onion epidermis or cheek cells. Place the specimen in a drop of water on a slide and add a drop of stain, such as iodine solution, which makes the cell parts easier to see. Lower a coverslip onto it at an angle, using a mounted needle, so that no air bubbles are trapped. Clip the slide on the stage, choose the lowest power objective lens and use the coarse focus wheel to bring the image roughly into focus. Then use the fine focus wheel to make it sharp before moving to a higher power.
Magnification tells you how many times bigger the image is than the real object. Total magnification is the eyepiece lens magnification multiplied by the objective lens magnification, so a ×10 eyepiece with a ×40 objective gives ×400. For a drawing or photograph, use: magnification = image size ÷ actual size. Both sizes must be in the same units, so convert millimetres to micrometres first (1 mm = 1000 µm). For example, a drawing of a cell is 50 mm wide and the real cell is 0.05 mm wide, so the magnification is 50 ÷ 0.05 = ×1000.
A scientific drawing records what you actually see. Use a sharp pencil, draw clear continuous lines with no shading or colouring, and make the drawing large enough to fill the space. Draw only what you can see, and add a title and the magnification. Label lines are ruled, so they are straight, touch the part they label and never cross each other.